 Did we miss anything on this map? Is there something we didn't discover? Let us know!
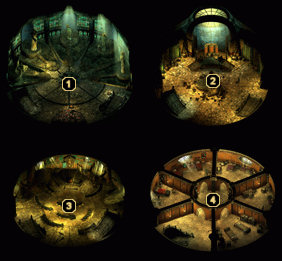
1 - First Floor
Did we miss anything on this map? Is there something we didn't discover? Let us know!
1 - First Floor
A priestess named Denaini will confront your party for attempting to desecrate the tower. Convince her that you mean no harm and she'll tell you about this elven shrine and her former duties here. Eventually she'll ask you to remove the "blasphemous state of existence" from the other priests in this tower, which essentially means you'll be slaying them all. Agree to her task and then use the southwest staircase to reach the second floor.
After putting all of the priests out of their misery, you can return to Denaini to receive 24,000 experience points and
Edley's Sling. If you have the Barrel of Holy Water from the fourth floor, you can turn it over to Denaini in order to purify the pools here in the elven shrine. Having restored the shrine to its former glory, your party will receive 52,500 experience points and
Sune's Laurel of Favor.
2 - Second Floor
A few Shadowed Elven Clerics and several Shadowed Elven Acolytes immediately attack your party when you arrive on this floor. Put them to rest, per Denaini's request, and then check the two containers in the room to find some gold, two potions, a gem, and a random magic weapon (such as a
War Hammer +2 or
Sanctified War Hammer +2).
3 - Third Floor
You'll have to deal with more Shadowed Elven Acolytes, Clerics, and a Priest on this floor. The Priest is obviously the most dangerous in the group, so focus on him first. When the battle is over, search the Priest's corpse to find a random magic amulet (such as the
Symbol of Corellon Larethian or
Symbol of Labelas Enoreth). Plunder the three containers as well to turn up another Piece of Broken Machinery, three potions, a gem, a scroll of Minor Globe of Invulnerability, some gold, and a random magic item (such as
Elven Chainmail of the Hand +3 or
Ring of Strength).
The stairs in the southeast corner will take you to the fourth floor.
4 - Fourth Floor
This floor is comprised of six separate rooms, with your party first arriving in the southwest corner. Moving clockwise, the next room contains two Shadowed Elven Acolytes and a Shadowed Elven Cleric. Slay them all, then loot the chest at the foot of the bed for a
Potion of Regeneration, a scroll of Remove Curse, and a
Ring of Sanctuary.
Continuing on in a clockwise fashion, the third room contains two potions and a scroll of Remove Paralysis on the shelf, the fourth room contains a gem, a potion, and a scroll of Protection From Fire in a chest by the bed, the fifth room contains a scroll of Flame Strike and a potion in the box along the wall, and the sixth room contains two more Shadowed Elven Acolytes and a Shadowed Elven Cleric guarding two containers. In one container, you'll find scrolls of Cure Serious Wounds and Emotion: Courage, two potions, and a Barrel of Holy Water. In the other, you'll find an
Elixir of Health, a scroll of Flame Strike, and a
Symbol of Sehanine Moonbow. Make sure you grab the Barrel of Holy Water from the first chest, as you can hand it over to Denaini on the first floor for an item and extra experience.


